C3 Supper Club


Validating your site in the Google Search Console has evolved substantially over the years, with some of the latest updates now allowing for Google domain verification.
Put simply, Google Search Console verification can provide huge benefits for any domain with multiple attached subdomains. For example, with the new domain verification system, you’ll now be able to see an aggregate view of all the data for the entirety of your domain network.
Once domain validation is set up, you can also quickly validate new sub-domains or sub-folders that you want to view separately in the Google Search Console.
You no longer need to attempt validation via Google Analytics or Google Tag Manager, which can be at times problematic, and you won’t need to rely on the fallback method of uploading a file to the server, which, again, adds to delays.
Instead, Google Search Console verification makes the whole process incredibly streamlined and easy to follow.
In fact, you can complete your domain verification today using the steps shown in the video, but we’ve also outlined it in full below:
In order to begin the verification process, you’ll require one key thing: access to your specific domain provider so you can amend your domain’s DNS settings. With this, finalising your Google Search Console verification is simple.
To begin, go to the Google Search Console and click the drop-down for the domain property in the top right corner.
Upon clicking it, you’ll be presented with a list. Scroll to the bottom of the drop-down box and select add property.
Now that you have access to the property box, select domain and type in the domain you want to verify.
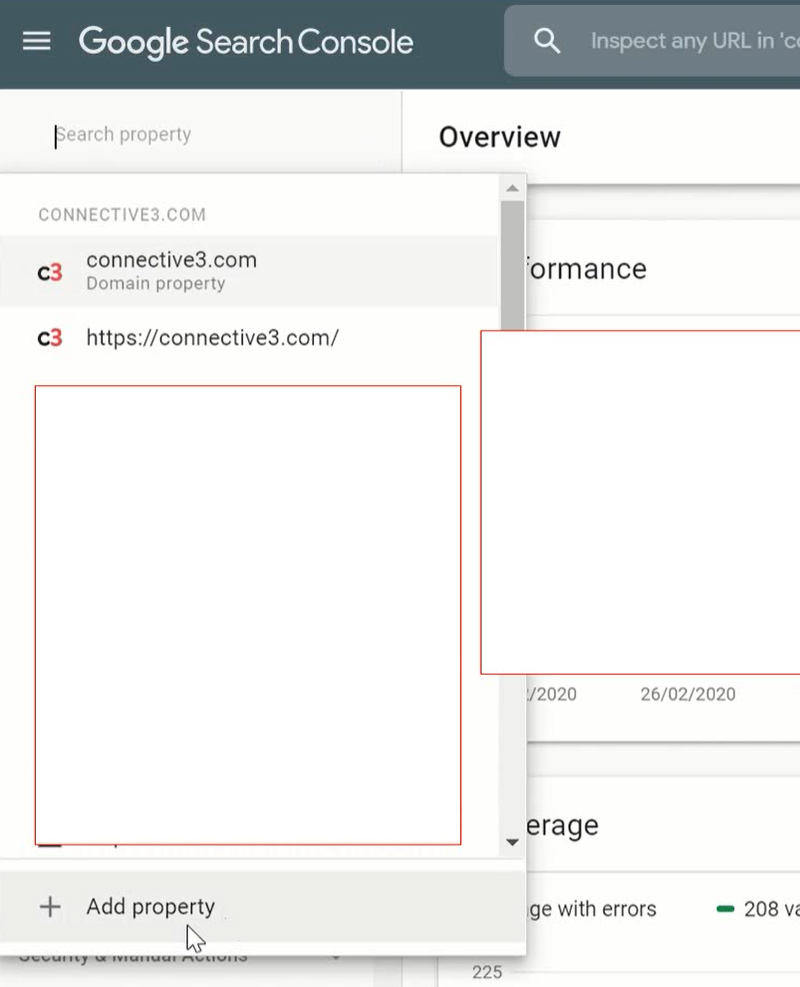
Once you’ve done this, click continue and you’ll be provided with a TXT record that you’ll need to add to your DNS. Copy the Google Search Console verification code and click verify later.
Before we can complete the domain verification, we first need to access our current domain provider DNS settings.

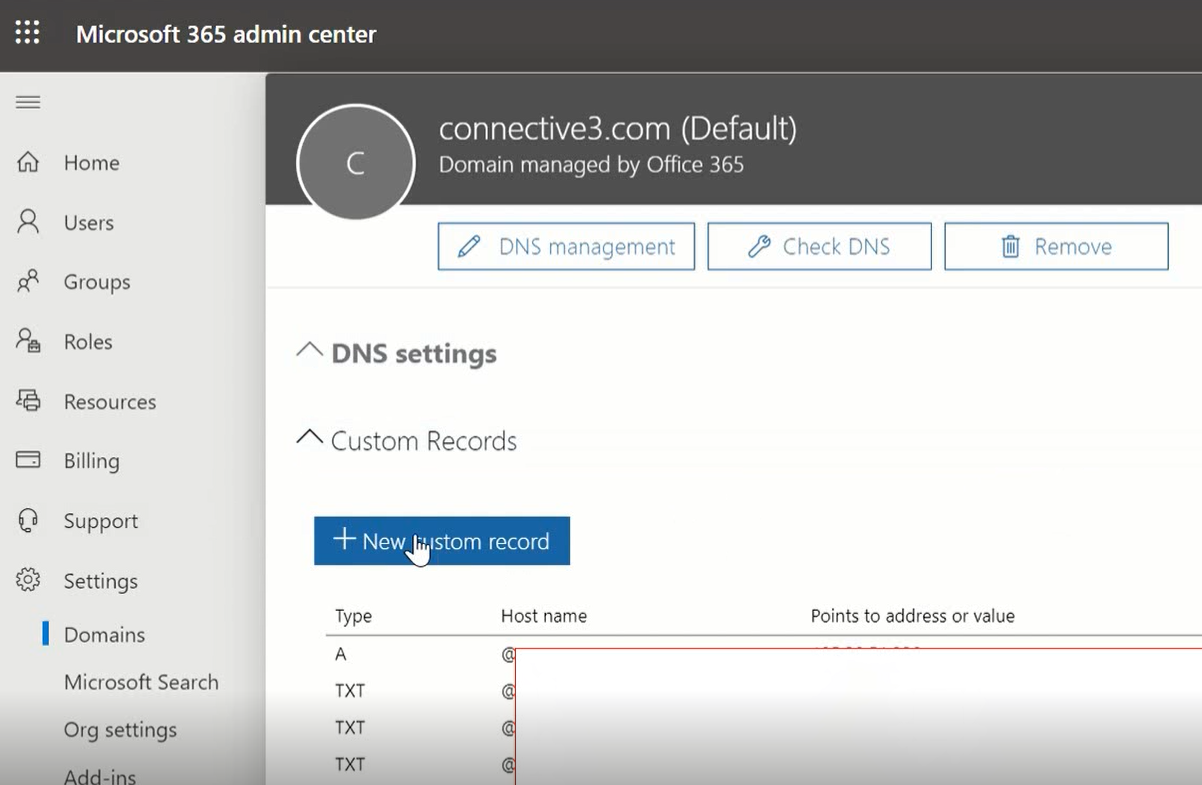
You now need to log in to your domain provider, to access your domain’s DNS settings. For our example, we’ll use Microsoft.
With Microsoft, you log into the admin portal, go to settings, and select your domain. Once your domain is selected, you need to click on New Custom Record.

Now select the TXT (Text) value box and paste your previously-copied Google Search Console verification code into the field.
Once you’ve saved this, you’ll need to wait for the domain settings to propagate the web (this can take anywhere from 10 minutes to a maximum of 48 hours). You can check the status using providers such as Dnschecker.org to alert you as to when the process has been completed.
When the changes have been fully propagated, you’ll need to verify your domain to use the updated settings.
Click on the drop-down Properties menu on the top left of Search Console, and scroll to the bottom of the list. At the bottom will be a section that reads Not Verified Sites. All you need to do is click on the site you want to be verified.

Once selected, if everything relating to the changing of your DNS has been completed correctly, your site will verify properly and your Google Search Console verification will be finished.
And best of all, once your primary domain verification is verified, all of your sub-domains, sub-folders, and associated URLs under that domain will auto-verify as well.

Domain verification is just one of many things you can do with the Google Search Console and Google in general. We’ve also touched on how to use Google App Scripting to streamline your use of Google Apps, and there are many more articles like this over on our blog.
But it’s not just tech help we offer. Check out our other services, ranging from paid search to content strategy and SEO. Who knows? We might be able to take your business to even greater heights.